Graph Configuration Options
In the Getting Started guide, we built our first graph: a simple yet functional chat powered by an LLM. That example focused on quickly creating and connecting the essential nodes, configuring a minimal agent, and running the graph to see how everything works end to end.
Now that you have successfully built and executed your first graph, it’s time to dive deeper. The Graph Builder offers a wide range of configuration options that allow you to tailor a graph’s behavior to your specific needs.
You can run these graphs not only from your own code but also from the command line using the awpak-ai-cmd-client, a CLI tool designed for quick testing and running of graphs without writing any code.
In the following sections, we will explore these options one by one, starting with the general configuration settings available at the top level of any graph.
Graph Config Section
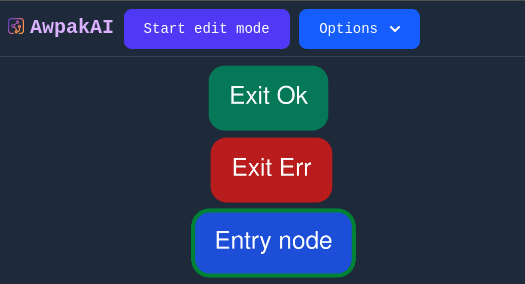
When opening the Graph Builder, the first view shows the graphical representation of nodes and their connections.
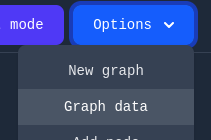
To access the graph-level configuration options:
- Open the Options dropdown at the top of the page.
- Select Graph data.
- In the resulting view, look for the section labeled Graph config.
This section contains three key fields:

1. Input data type
This field defines the expected type for the graph’s input. The following options are available:
- Null
- Bool
- Number
- String
- Array
- Object
If you do not select any value, the input will be treated as a simple String.
When a type is selected, the graph will attempt to convert the input to the chosen type.
If the conversion fails, execution will stop, and an error will be returned.
2. Initial context
This field allows you to define a JSON object representing the graph’s initial execution context.
By default, the context is an empty object ({}).
The initial context is useful for providing default values, configuration data, or any state required for nodes during execution.
3. Preserve context
This checkbox determines whether the execution context should be preserved after the graph finishes running. If checked, the context from one run will be carried over to the next, allowing stateful behavior across executions.
For example, if your graph pauses to request additional user input and then resumes execution, you can retain previous values without resetting everything.
Tip: When using the CLI tool awpak-ai-cmd-client, you can enable interactive input handling by passing the
--chatoption. This allows you to provide runtime input dynamically, which works seamlessly with preserved context.
Next Steps
Now that we have explored the basic Graph config options —including the input data type, the initial context, and the option to preserve that context— it’s time to see them in action.
In the next section, we will build a very simple graph that continuously adds the numbers entered by the user. This example will let us apply the configuration parameters we have just learned, especially the Preserve context option, which will allow the graph to remember the accumulated sum between executions.