Getting started with AwpakAI
In this first example, we are going to create a simple chat workflow to interact with an LLM (Large Language Model). We will use the web-based graph builder to define the workflow visually and export it as JSON for execution.
Default Graph Layout
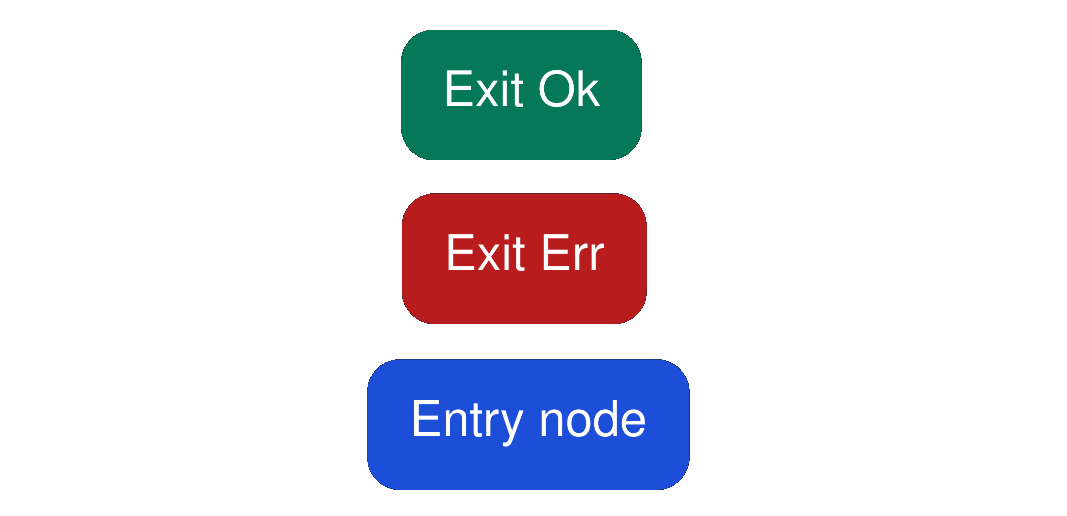
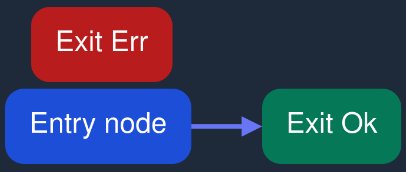
When you open the graph builder, you will see three disconnected nodes:
- Entry Node - This is the starting point of the graph and will be executed first.
- Exit Ok - A terminal node indicating that the workflow has completed successfully.
- Exit Err - A terminal node indicating that the workflow has ended with an error.
About Exit Nodes
Exit Ok and Exit Err are terminal nodes: clicking on them does nothing because they have no configurable options.
They are only used to signal how the workflow finishes:
- Use Exit Ok when execution completes successfully.
- Use Exit Err when execution fails.
Editing the Entry Node
Clicking on the Entry Node will open a configuration form where you can set its options.
For this first example, we will configure it to send the user's input to a language model and return its response.
Configuring the Node to Call an LLM
When you click on the Entry Node, a configuration form will appear.
One of the most important sections in this form is Node executor, which contains a dropdown labeled Executor type.
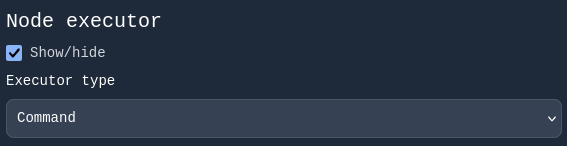
Selecting the Executor Type
By default, the executor type is set to Command.
For our chat example, change it to Agent.
Once you select Agent, the form updates to show additional options for configuring the AI agent.
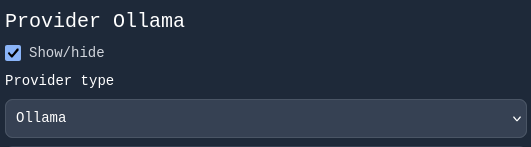
Selecting the Provider
In the Provider type dropdown, you can choose from the following supported providers:
- Ollama
- OpenAI
- DeepSeek
- Gemini
For this example, we will use Ollama because it does not require an API key.
If you choose any of the other providers, an additional field labeled Api key will appear.
Important: you cannot paste an API key directly in this field.
Instead, you must store your API key in an environment variable and specify the name of that variable here.
Selecting the Model
After selecting Ollama as the provider, a new section appears for selecting the model.
This section has two fields:
- A dropdown labeled from
- A text field
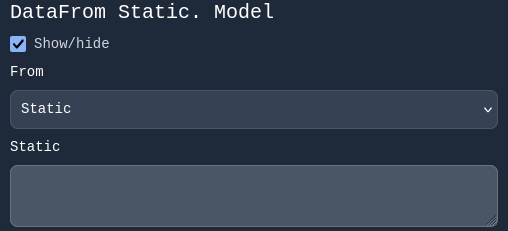
This structure, titled DataFrom, is used in many other parts of the form.
The From dropdown lets you choose where the value comes from:
- Context: use a value stored in the graph context
- Input: use the graph input
- Static: specify a fixed value manually
- *(we will cover other options later)*
For our example, choose Static and enter the model name: llama3.1.
You can replace llama3.1 with any model you have installed locally.
Since this example uses Ollama as the provider, make sure that Ollama is running on your local machine before executing the graph.
Configuring the Prompt
Below the model configuration, you will see three sections:
- System prompt
- Prompt
- MCP Servers
For this example, we only need the Prompt section.
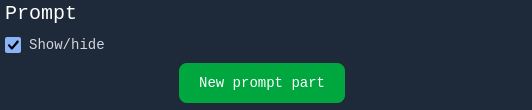
1. Click the New prompt part button.
2. A new prompt section appears with:
- A text field labeled Prefix
- A DataFrom selector in the middle
- A text field labeled Suffix
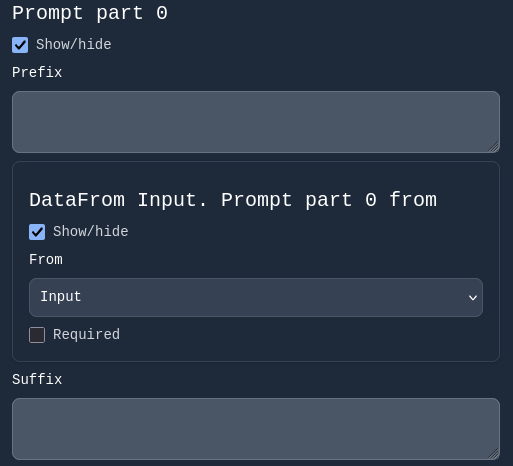
For our chat workflow:
- Set DataFrom to Input (we want the user input as the prompt).
- Leave Prefix and Suffix empty (they are optional and allow adding extra text before or after the main input).
Tip: You can create multiple prompt parts by clicking New prompt part again.
For example, you could concatenate user input with a value from the context.
Enabling Chat Behavior
At the bottom of the form, you will see two checkboxes:
- Save history → keeps the conversation history across graph executions.
- Streaming response → enables streaming responses from the LLM.

For a chat use case enable both options
With these settings, our entry node is now configured to act as a chat agent connected to an LLM.
Next, we will connect the nodes to complete the workflow.
Connecting the Nodes
Now that the entry node is configured, let's return to the graph view to connect the nodes.
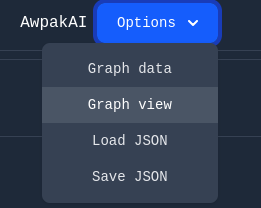
Switching to Graph View
At the top of the page, you will see a dropdown labeled Options.
Open it and select Graph view.
This brings us back to the default view, where we still see the three disconnected nodes:
- Entry Node
- Exit Ok
- Exit Err
Entering Edit Mode
To create connections between nodes, we first need to enable Edit Mode:
- Click the button at the top of the screen labeled Start edit mode
- Once activated, the label changes to End edit mode.


Creating a Connection
In our simple chat example, we only need to connect the Entry Node to Exit Ok:
- Click on the Entry Node and, while holding the click, drag towards the Exit Ok node.
- When your cursor hovers over Exit Ok, release the mouse.
- A connection arrow will appear between the nodes.
Once connected, click End edit mode to prevent accidental changes.
Saving the Graph as JSON
With the nodes connected, the last step is to export the graph:
- Open the Options dropdown again.
- Select Save JSON.
This will download a JSON file representing the workflow we have just built.
Running the Graph
While you can run graphs directly using the Rust library awpak-ai, there is also a command-line application available that allows anyone—even non-programmers—to execute graphs.
The CLI application is called awpak-ai-cmd-client.
You can find instructions to install it in its GitHub repository.
Running the Example
For our simple chat workflow, run the following command:
awpak-ai-cmd-client --path="/path_to_graph.json" --trace="agent_stream" --chat
Parameters:
- --path: Path to the JSON file representing your graph.
- --trace: Set to `agent_stream` to enable streaming output from the agent (this works because we enabled Streaming response in the graph configuration).
- --chat: Starts an interactive console prompt. Type your messages and press Enter to send them to the graph input.
This will run the workflow we created, using the LLM agent, and display streaming responses directly in your terminal.

Next Steps
Now that you've built your first graph and successfully run it, you might be wondering what other options are available to customize its behavior.
In the next section, we'll explore the initial configuration options of a graph in more detail — from setting the expected input type, to defining an initial context, and deciding whether to preserve that context between runs.